4. Create instances
Instances go on a second view. One view per facet keeps the shapes readable and the example data readable.
A view for the books
- Click the + after the editor tabs.
- Type
Booksas the file name and press Enter.
The view opens as an empty canvas with the label Books, the base name of the file. The label gives the IRI of the view, urn:name:Books, which the document of step 6 uses.
Two books and an author
- Select the Book tool in the palette and click the canvas. Type
Animal Farmand press Enter. - In Properties, type the title and the publication year
1945. - Create a second book,
Nineteen Eighty-Four, published in1949. - Hover the Animal Farm card and click +. Select author, then type
George Orwelland press Enter.
The last step creates the author and the relation in one edit. The arrow between the two cards is the statement.
The controls around a card
Hover a card to show its controls. The arrows on the left and right sides expand: they place the neighbors of the card that the view does not show yet, incoming on the left, outgoing on the right. The + signs create: a new relation, and if you type a name, a new element at its end. The × removes the card from the view and leaves the model as it is.
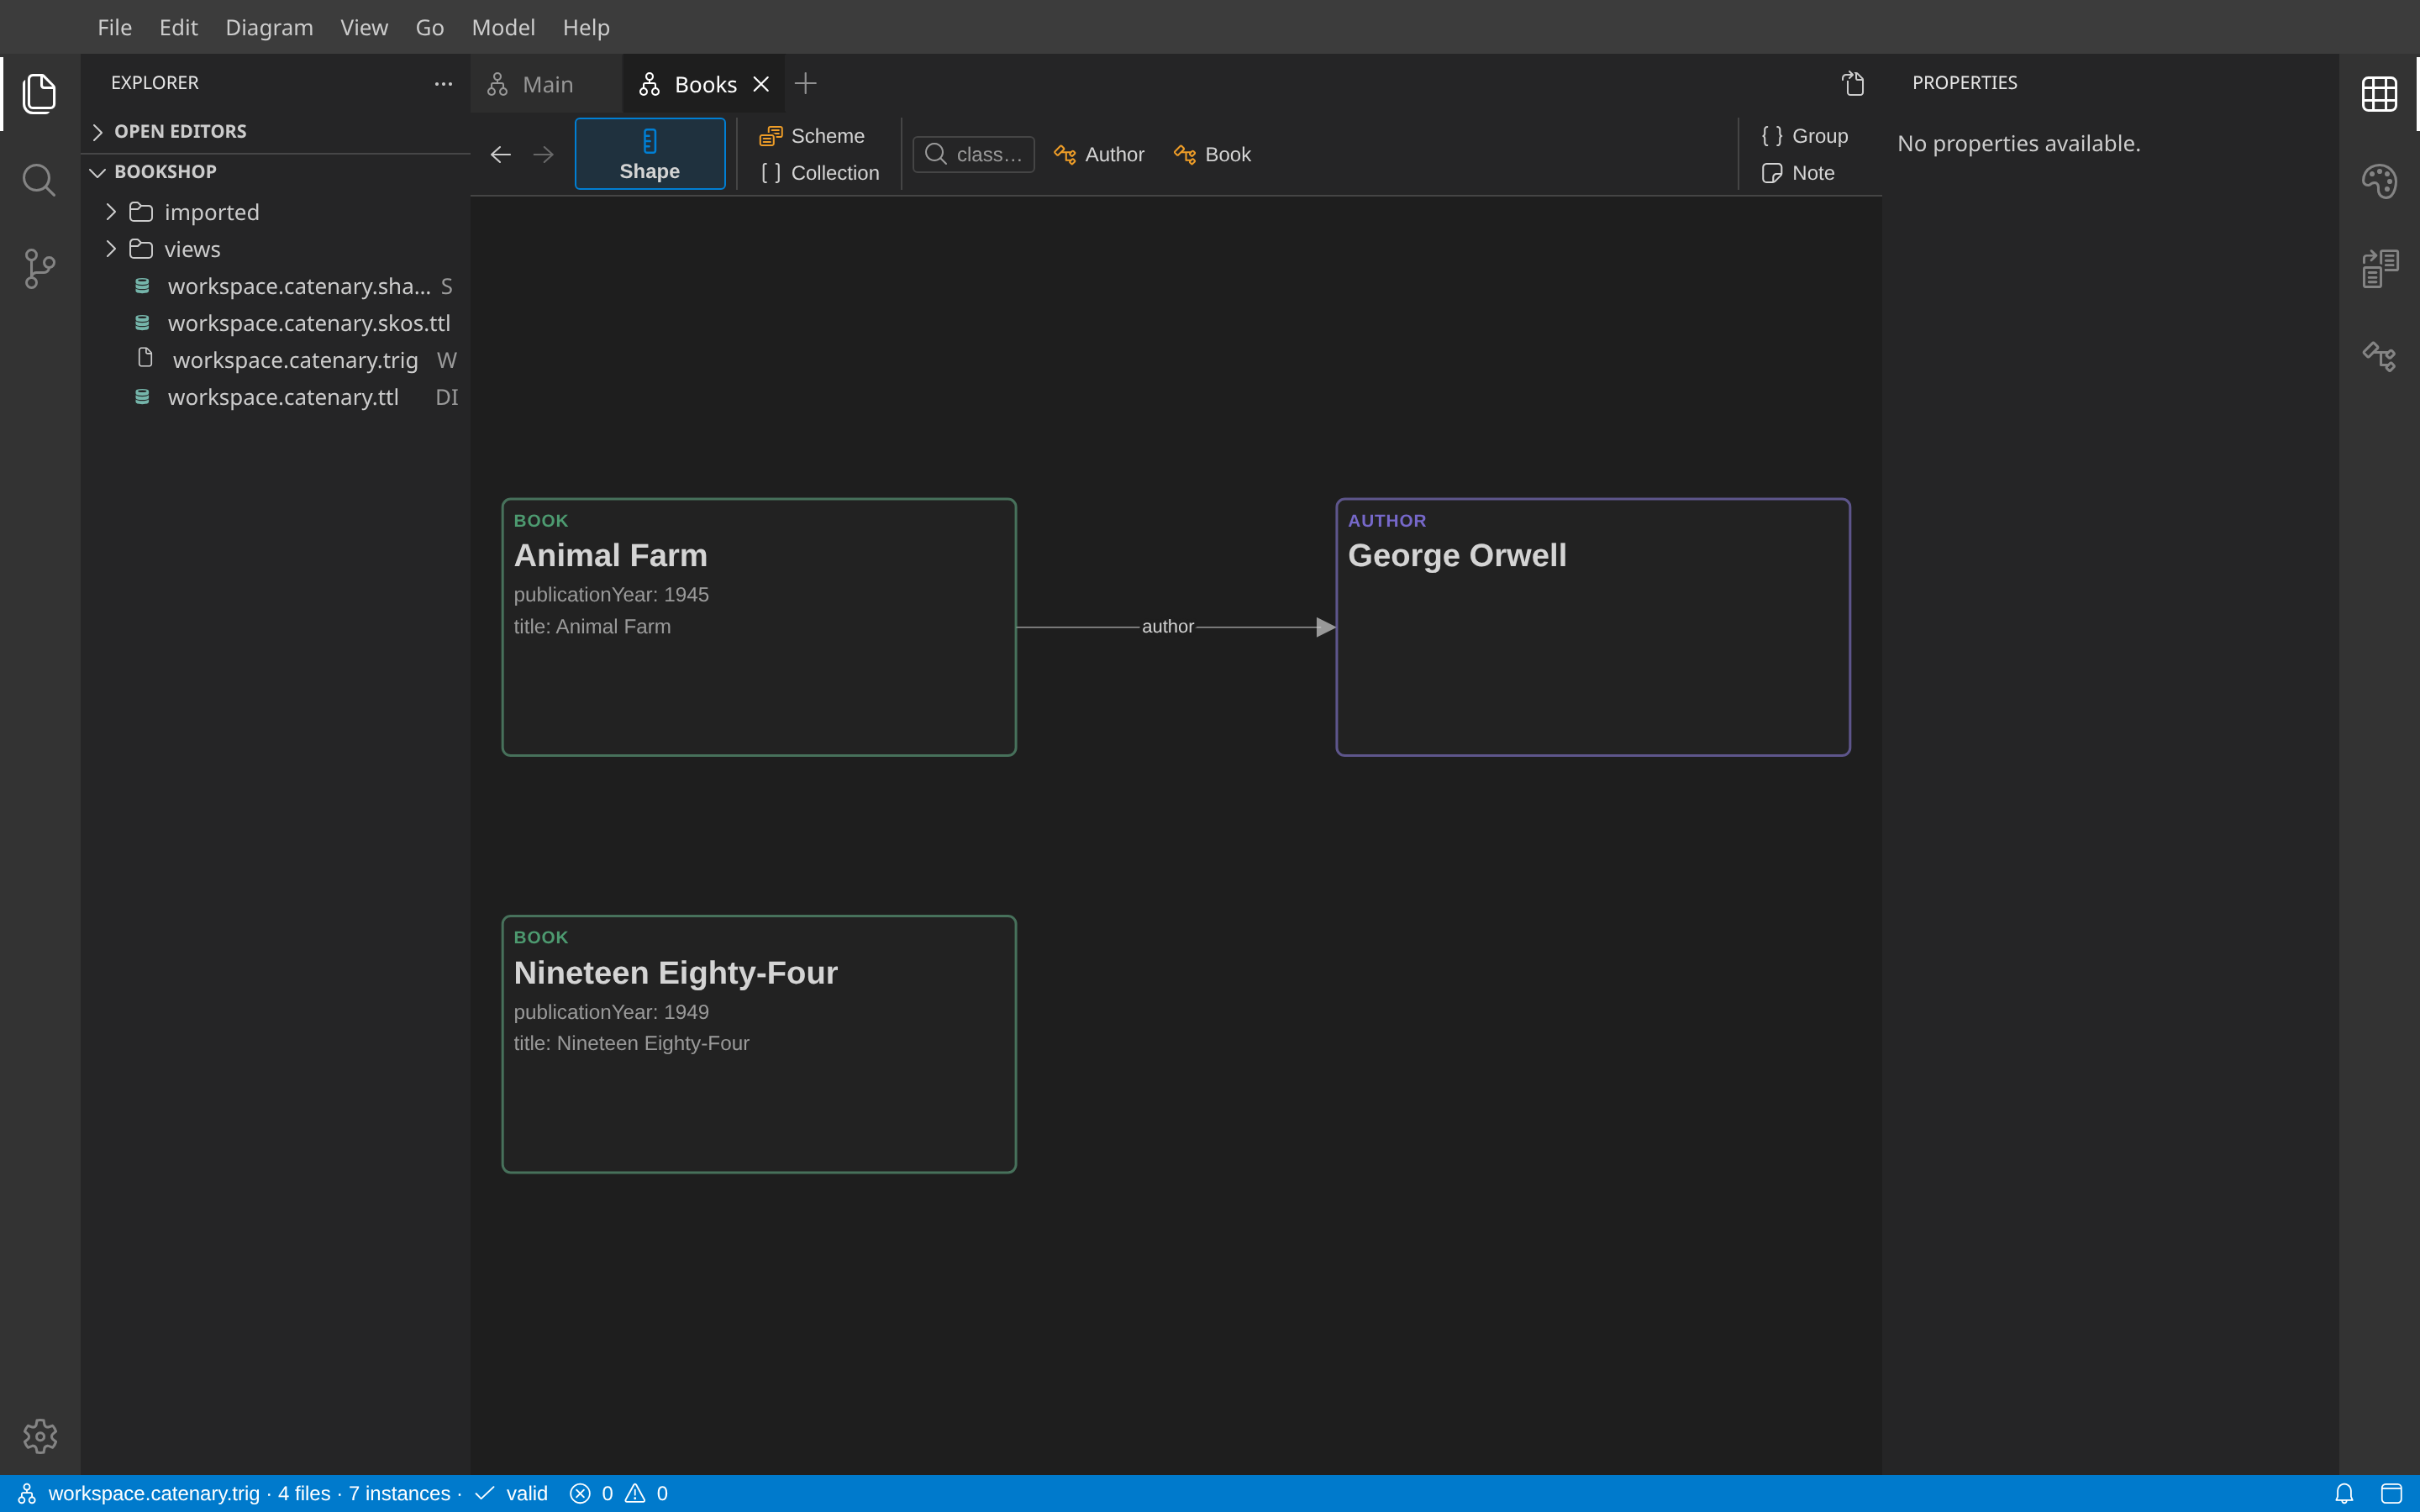
Each card shows the values of the instance. The status bar says that the model is valid: both books have a title, as the shape requires.
Next: Update the shape.